Roxakia; Greek Syrup Sweets
Welcome to KimBakesMeHappy! These sweets are one of my favorite to bake on a cold winter day. It just makes the whole house smell so good and cozy.
Hopefully you enjoy making and eating them as much as I do, happy baking!

Roxakia
Course: SweetsCuisine: Vegan30
servings30
minutes25
minutes2
hours3
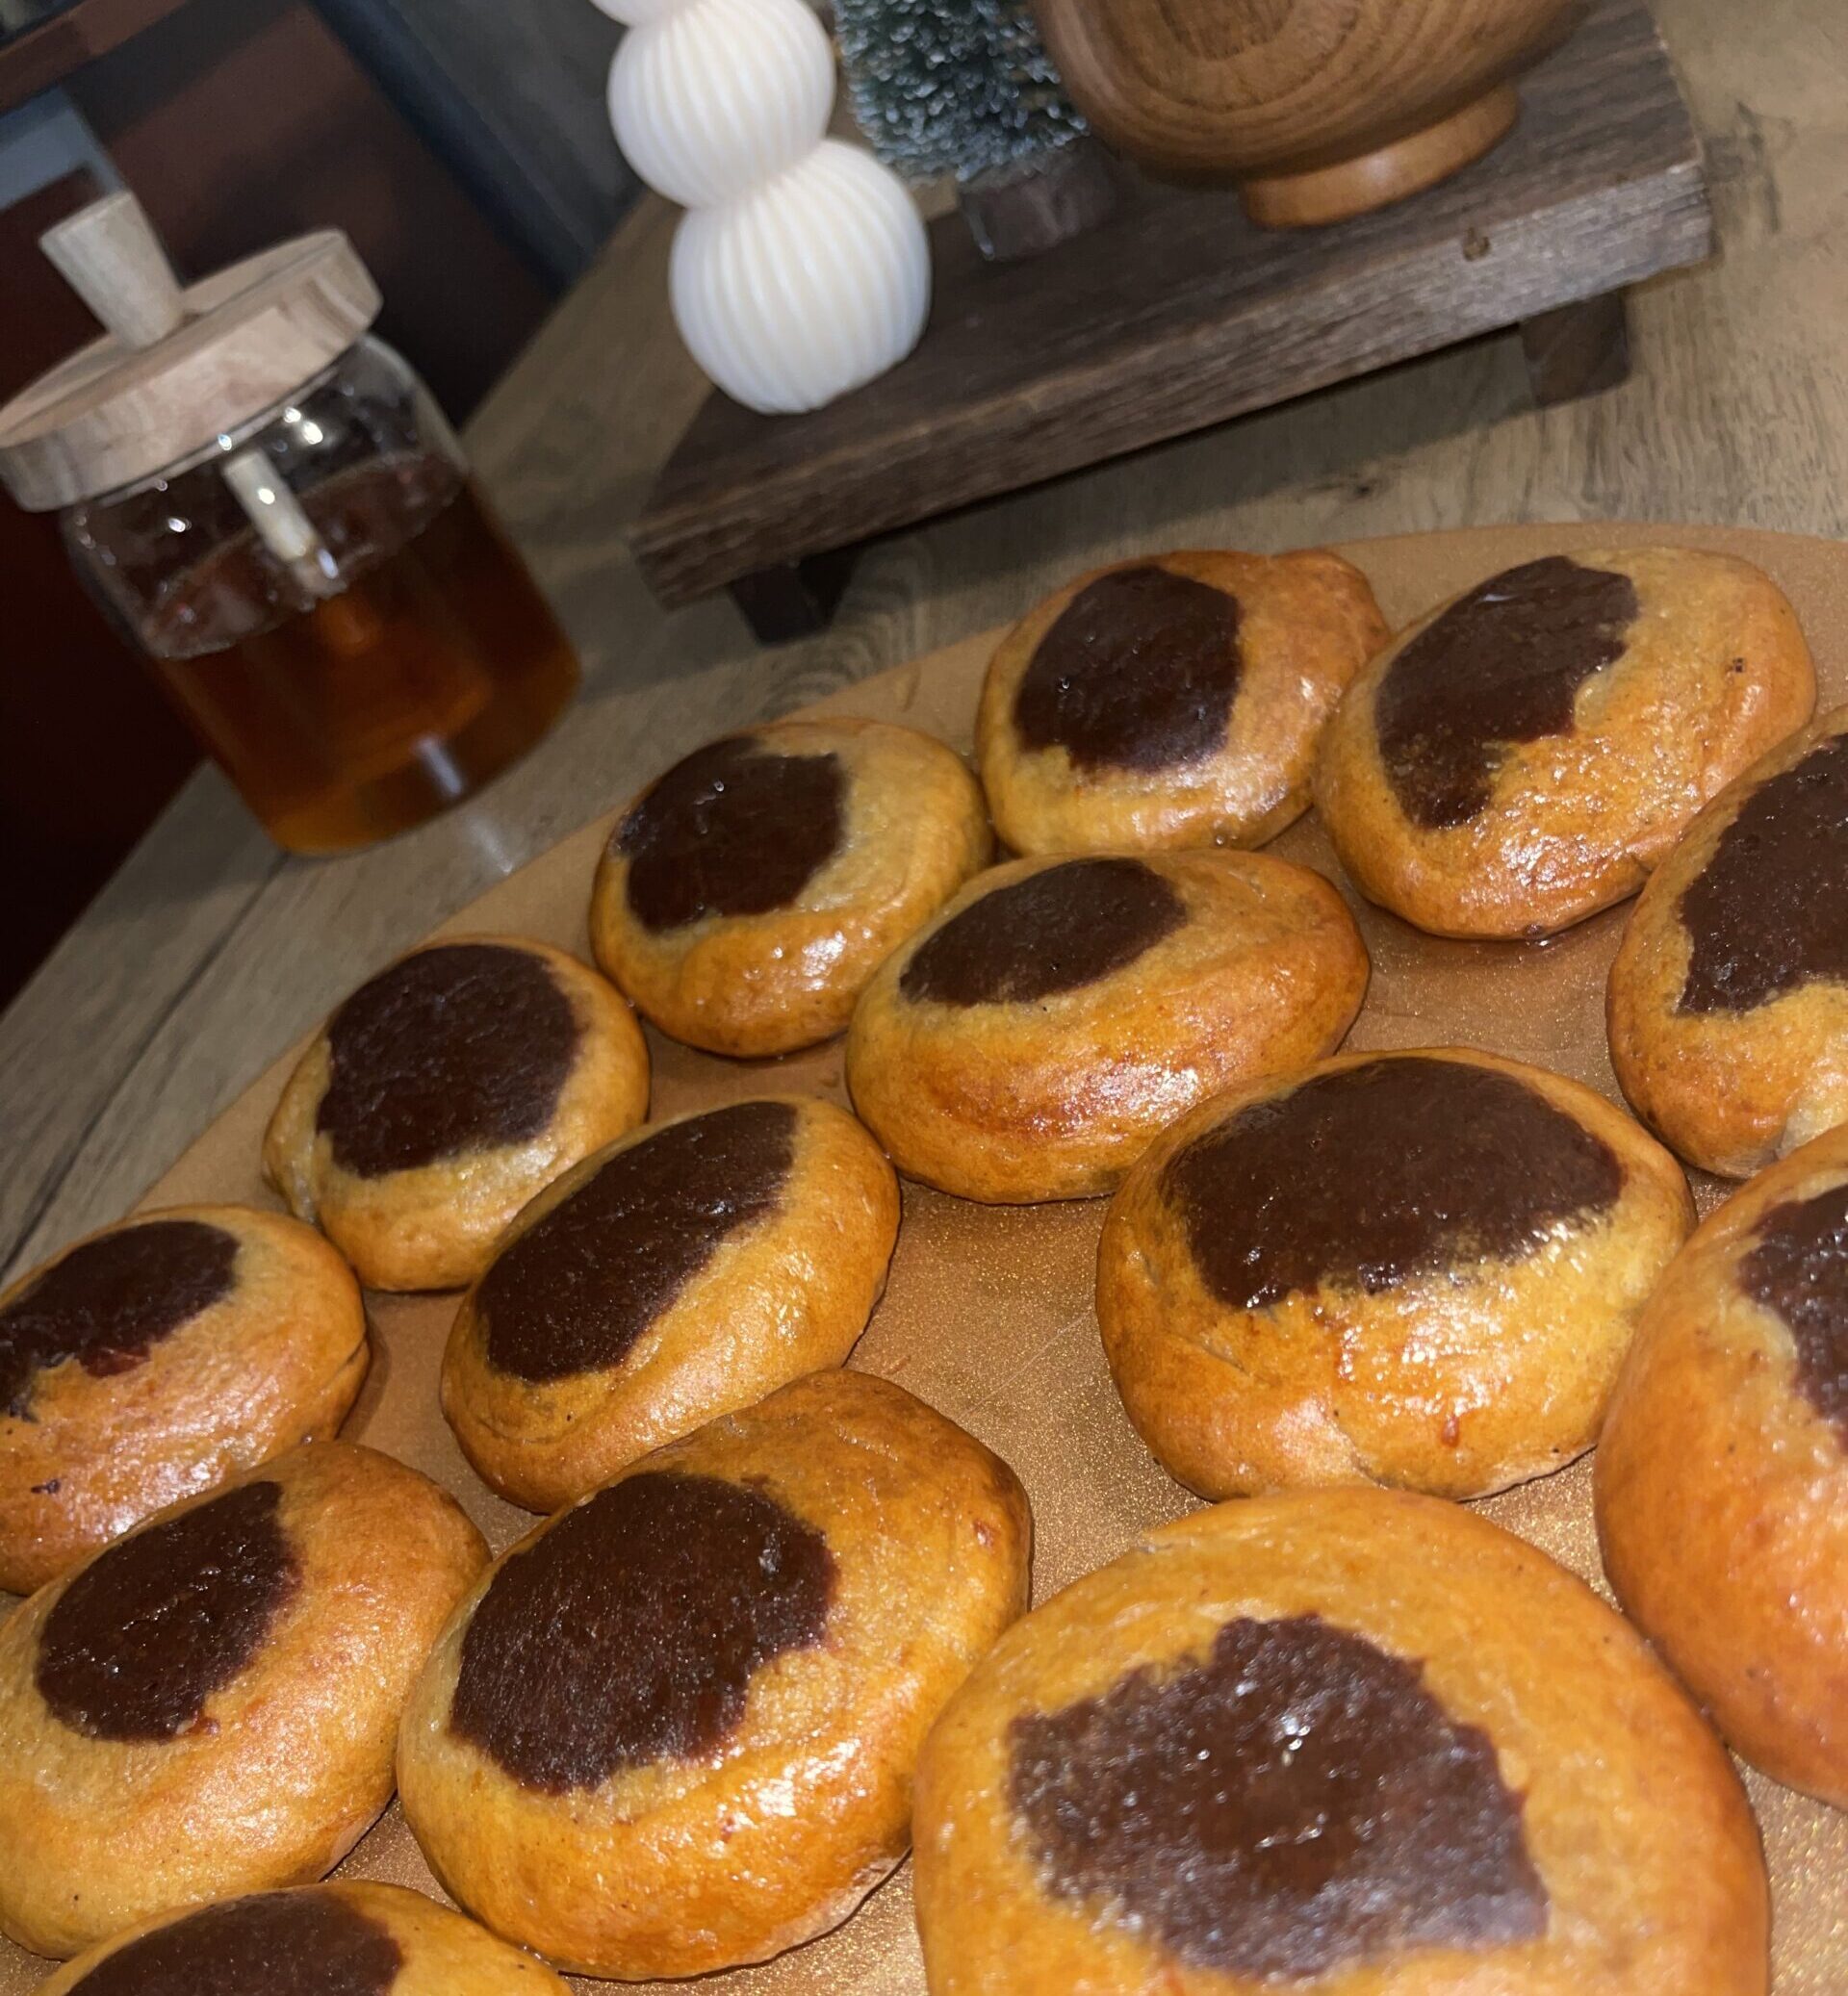
hoursThese Greek syrup sweets are a must have in your house, especially during the dark days of the year. I promise that this recipe is super easy to make, and you will love the result! After all, who doesn’t like orange, cinnamon & cocoa all combined in one pastry 😉 ?
Ingredients
- Syrup
3 cups water
3 cups sugar
1 orange peel
Juice of 1 orange
1 cinnamon stick
- Dough
¾ cup lukewarm water
2 tbsp sugar
1 tbsp dry yeast
3½ cups all purpose flour
1 tsp baking powder
1 tsp cinnamon
¼ tsp nutmeg
¼ tsp salt
1 tsp vanilla extract
1 tbsp orange zest
½ cup orange juice
½ cup vegetable oil
¼ cup olive oil
- Chocolate dough
⅓ cup cocoa
4 tbsp orange juice
1½ tsp cinnamon
- Equipment
Baking tray & parchment paper
Small cooking pot
Grater & sieve
Instructions
- Syrup
- Squeeze the juice out of one orange. Then, remove the peel from this orange (try to not include the white inside part of the orange since this can give a bitter taste to your syrup).
- Combine all the ingredients into a small cooking pot over medium heat. Let it come to a boil until the sugar melts (stirring occasionally).
- Remove the pot from the heat and set aside to cool.
- Dough
- In a large bowl, combine water, sugar and yeast. Whisk to combine and let it sit for approximately 10 minutes. The yeast should make this mixture puff up slightly.
- In a separate bowl, whisk together the flour, baking powder, cinnamon, nutmeg and salt, and set aside.
- Once the yeast has proofed, add the vanilla extract, orange zest, orange juice, and the oils to the bowl. Whisk to combine.
- Add the dry ingredients and knead the dough with your hand for a couple of minutes until a soft ball is formed.
- Separate the dough into two portions; one consisting of approximately ¼ and one consisting of ¾ of the dough. Transfer the larger part of the dough to a bowl, cover and let it rise for about 2 hours, or until it doubled in size.
- Sift the cocoa powder and cinnamon on top of the smaller portion of the dough. Add the orange juice. Knead with your hands to combine. If the mixture seems too sticky, add some additional flour. Also cover and let this dough rise until it doubled in size, for about 2 hours.
- After the doughs have risen, preheat the oven to 175 °C and separate both portions of dough into two. Flour your surface, and first roll the chocolate dough into a 2 cm thick log, and set aside. Then, on the same floured surface, roll out the vanilla dough into a rectangle. This should be about 30 by 20 cm.
- Place the chocolate dough log on top of the vanilla dough, along one of the long edges and wrap the vanilla dough around the chocolate dough. Slice the log into approximately 15 equal pieces (of ± 2 cm each) with a sharp knife or dough cutter. Shape each piece with your hand into rounds. Place them on a parchment lined baking tray and flatten the pastries a bit, so they are about 1 – 1½ cm thick.
- Bake them for about 24 minutes in the middle of the oven (until they look golden brown).
- After they get out of the oven, remove the parchment paper and immediately pour half of the cooled syrup over them. They should soak for 15 minutes before flipping sides for another 15 minutes. Turn them over again, most of the syrup should be absorbed.
- Repeat this process with the second portions of the dough.
Notes
- You can make the pastries as syrupy as you want. I like to have them soaked completely, but if you do not like this you could dip the roxakia after baking in the syrup for 20 seconds per side and get them out.
- When the roxakia are cooled down you can store them at room temperature or in the fridge, whatever you prefer.